查看本机配置
终端输入命令php -v
1 | $ php -v |
本机环境:windows10 PHPstudy PHP7.4.3 NTS + Nginx1.15
先附上链接地址懒得找
yaf 扩展下载地址:https://pecl.php.net/package/yaf
yaf github项目地址 : https://github.com/laruence/yaf
yaf 框架文档:https://www.laruence.com/manual/
yaf 扩展文档:https://www.php.net/manual/zh/book.yaf.php
下载yaf
要使用yaf首先要开启PHP的yaf扩展官网下载
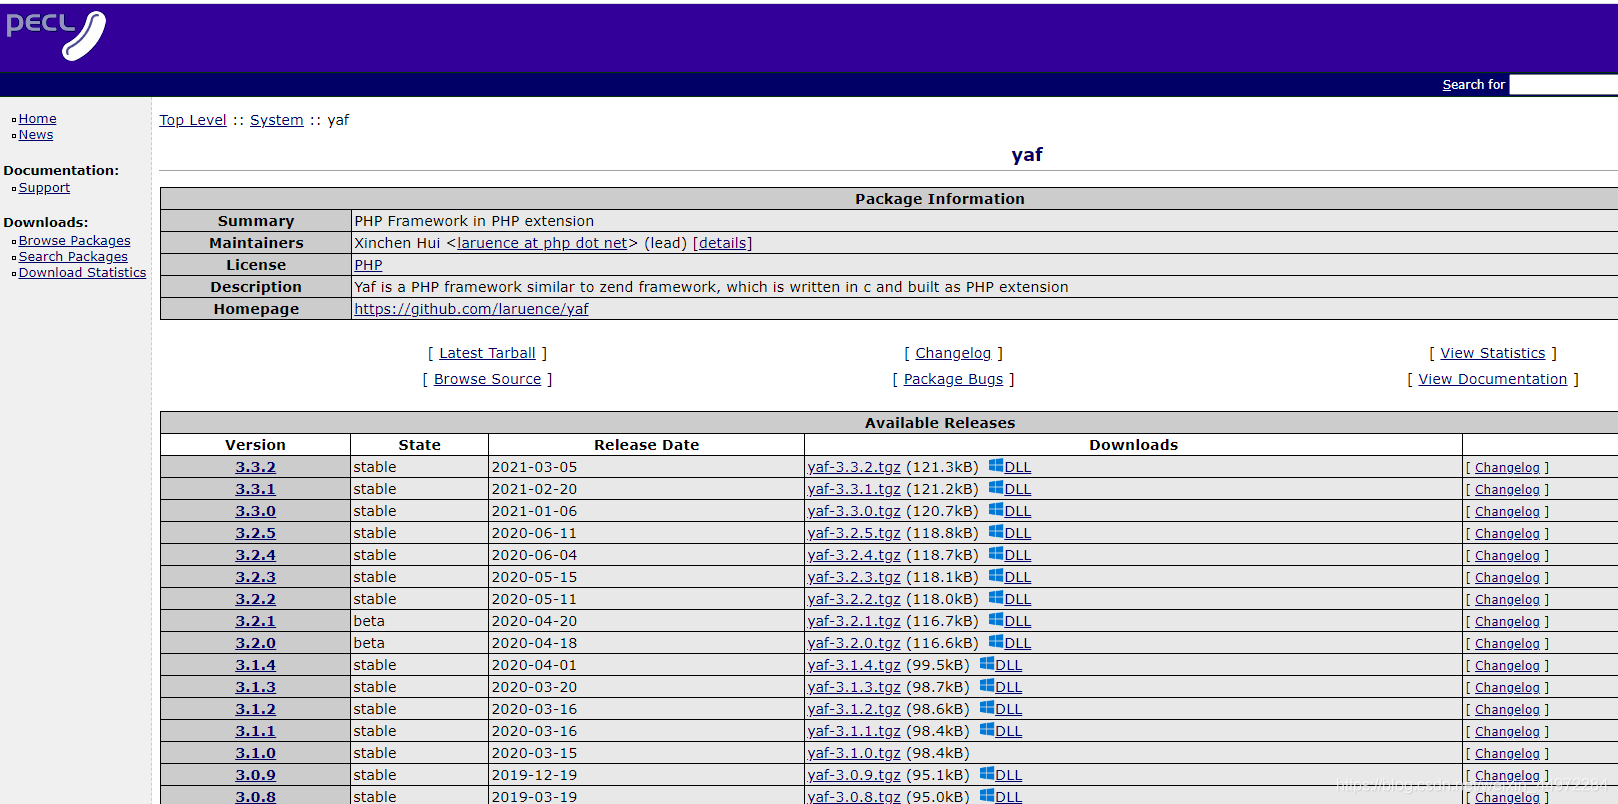
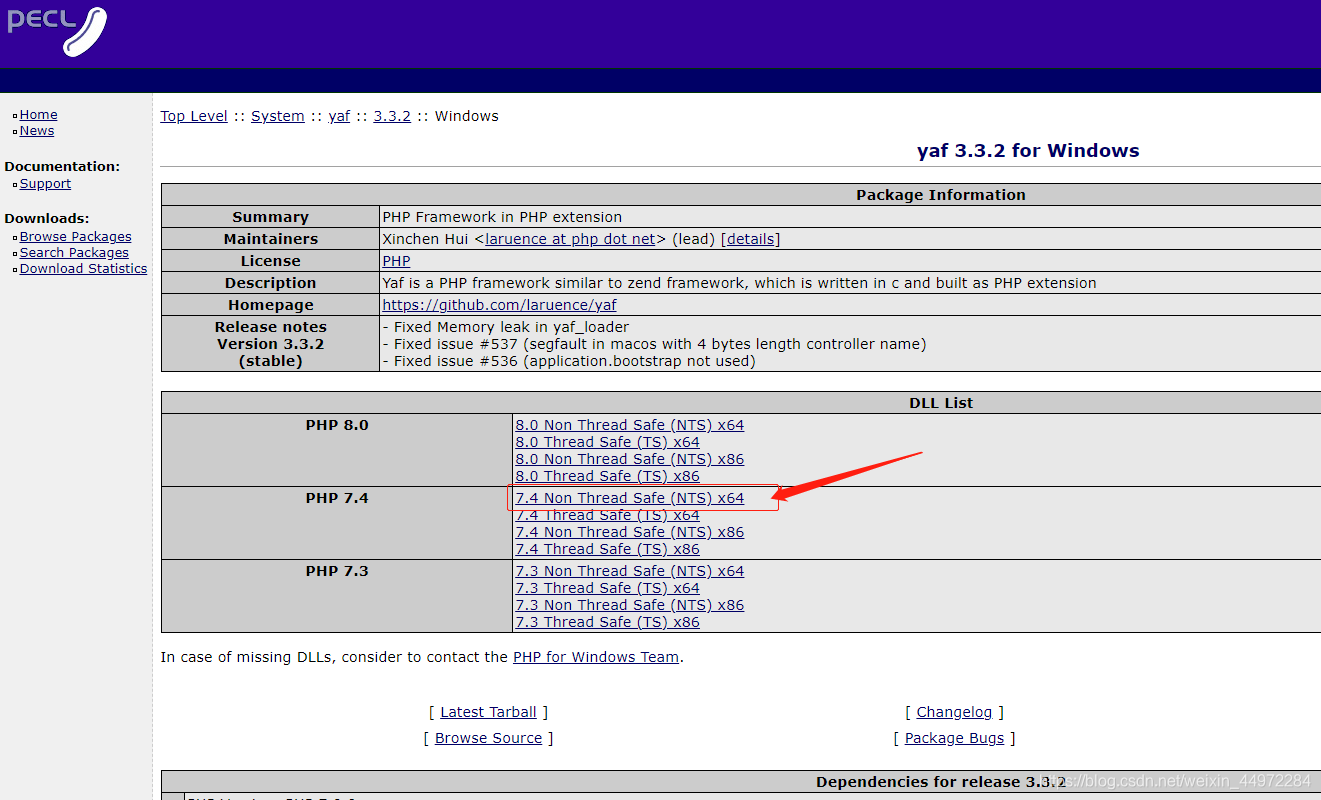
一,选择对应版本,楼主用的PHP7.4所以下载的最新版本3.3.2

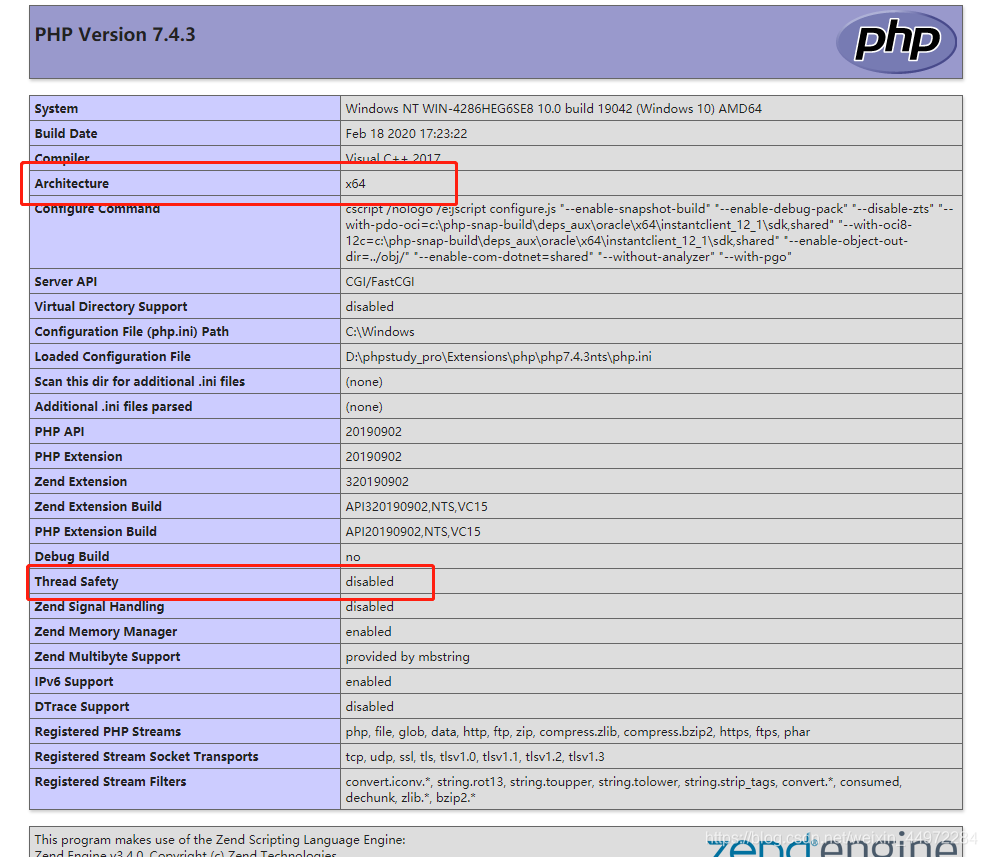
二,通过phpinfo()选择NTS 还是TS的版本,以及X86或者X64

三,disable线程非安全选择:

加载yaf扩展
将下载完的yaf扩展解压,把里面的 php_yaf.dll 移到对应的php版本的ext目录下
如: D:\phpstudy_pro\Extensions\php\php7.4.3nts\ext
修改php.ini
在对应PHP版本的php.ini 加入yaf扩展,保存并重启服务器
1 | extension=php_yaf.dll |
检查模块是否加载成功
终端输入命令php -m,看到yaf说明就已经配置成功
1 | $ php -m |
编译yaf demo
yaf项目地址 : https://github.com/laruence/yaf
clone下项目
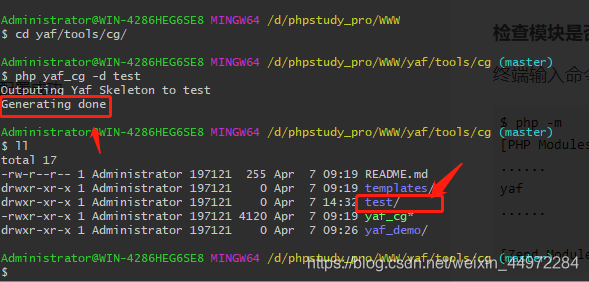
cd 进yaf/tools/cg目录,通过yaf_cg工具新建一个test项目
1 | git clone https://github.com/laruence/yaf.git yaf |

将yaf_cg工具生成的test目录复制到根目录,然后启动:Nginx,到了这一步我们的框架已经生成好了
目录结构
1 | + public |